Google Cloud Platform is Google’s response to highly popular Amazon’s AWS platform. I decided to give it a go and see how easy it is to set up a fully fledged Virtual Machine using Compute Engine.
Google Cloud Platform is a premium service but it offers a free trial including $300 of credit to spend on all its services over 60 days.
Step 1: Sign up
Sign up to Google Cloud Platform trial. You need to verify your account using a credit card but Google promises not to charge your account unless you upgrade your account.
Step 2: Deploy WordPress
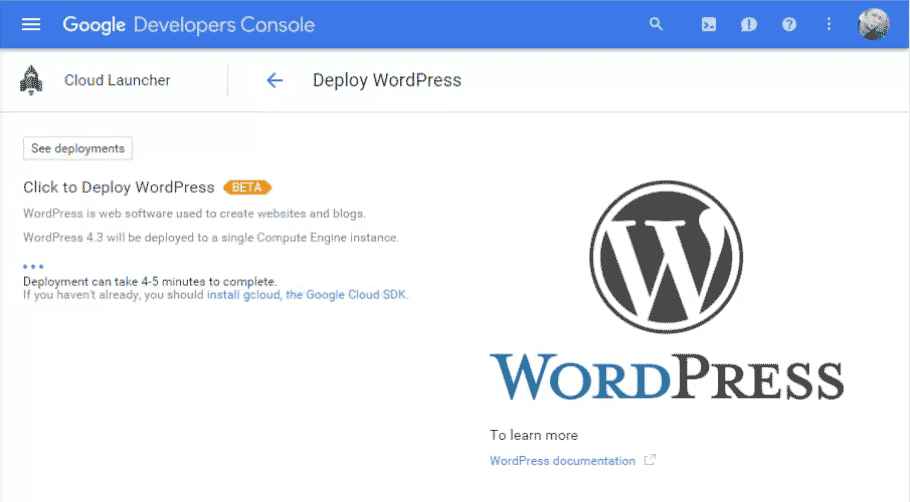
Once you’re inside the Developers Console, navigate to the Cloud Launcher section.
As you can see there’s a plethora of available Launchers here. Feel free to experiment with them. For the purpose of this article, I’m going to select WordPress (Google Click to Deploy).
Once you select the Launcher, you’ll have to fill in a form. Give the Deployment a name, select a zone that’s close to you, a Machine type – in this case f1-micro will be sufficient and a 10GB of Standard Persistent Disk space. You can install phpMyAdmin during this step to access the MySQL database. After choosing Server name prefix and selecting available Network name – press Deploy WordPress.
After a few minutes your fresh WP installation will be ready and you’ll be presented with the access details.
Click on the External IP link, select Allow HTTP traffic and Apply changes. You can access the site using the External IP assigned to your installation now.
Step 3: Assigning a domain name
If you don’t already own a domain name you can easily get one for testing purposes from dot.tk. Just make sure you don’t use it for production.
Once you set up a domain, go to Cloud Platform’s Networking Cloud DNS section and Select a Project from your projects list. Then press Create a Zone (more info).

- Fill in the Zone name,
- Enter the domain name in the DNS name field,
- Optionally populate the Description field and press Create.
- On the next screen select your newly created zone and press Add record set.
- Leave the DNS Name empty so it only has your previously selected domain name,
- Select Resource Record Type: A,
- paste your installation’s IP Address,
- Press Create.
- Add another record set.
- This time put
wwwin the DNS Name field, - and select Resource Record Type: CNAME. This will ensure both www- and non-www prefixes will be added.
Once you have the DNS set up all you have to do is provide your domain registrar the Name Server addresses, for example:
ns-cloud-e1.googledomains.com
ns-cloud-e2.googledomains.com
Give the DNS some time to update the routes. Once the domain points to your new WordPress installation access the Admin Panel using the access details previously provided by the Cloud Launcher. The address will be similar to [SERVER.IP.ADDESS]/wp-admin/.
Change both WordPress Address and Site Address to your new domain under /wp-admin/options-general.php.
That’s it! You can start experimenting with your fresh WordPress installation hosted on Google Cloud Platform.
External Links:
Setting Up FTP connection on Compute Engine
any video for this, thank you in advance
Do you have any idea how to add SSL (https) for GCD Launcher ?